3 Ways: How to Shine Your Shoes?
Do you want to appear presentable always in your official or formal outfit? One of the key aspects to have in mind is polish for shoes. Polishing your shoes to shine not only improves your appearance but also plays a major role in maintaining your shoes.
A pair of shoes that have been meticulously shined, preferably with some laces that make a statement, is an absolute must when dressing for formal gatherings.
Shoe shine can be achieved using various techniques, ranging from a straightforward buffing with a chamois cloth to the spitting technique used in the military to the more daring fire shining. However, the greatest secrecy lies in obtaining the polish for shoes accessories from the best brand in the market.
This article provides you with all guidelines on the shine for shoes. Let’s get started.

Content
What Are the 3 Techniques for Shining Your Shoes?
Easy shine and polish
Assemble your shoe polishing materials
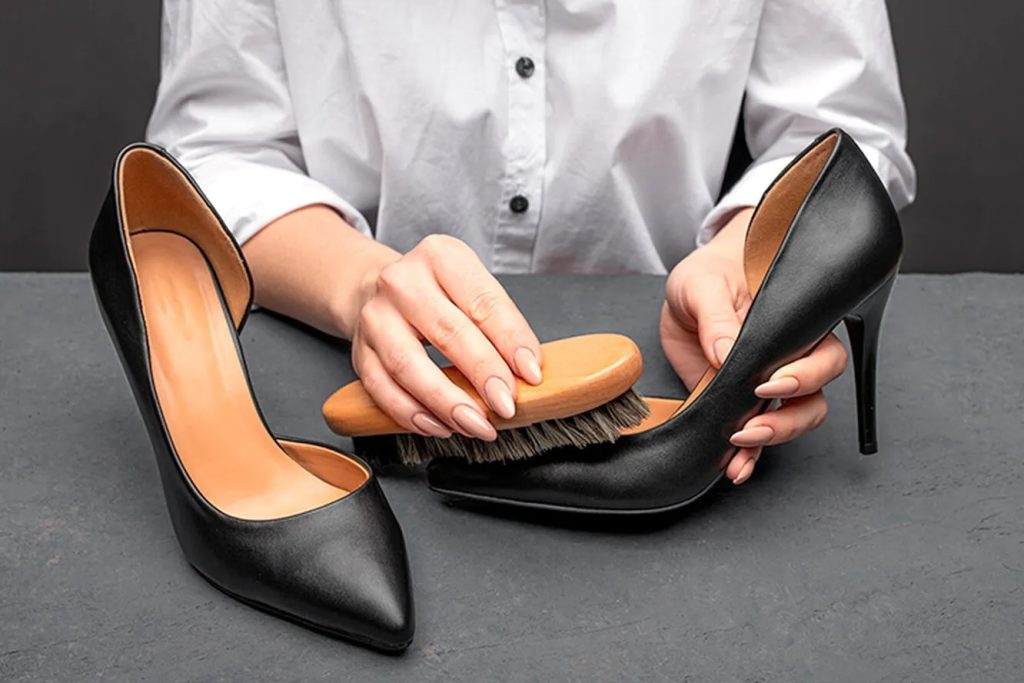
To shine your shoes properly, you will need a few specific items, all of which you can get in one convenient package in the form of a specialized shoe shining kit, or you may acquire them separately. You will need a tin of shoe polish, a horsehair shoe brush, and a soft towel.
A wide range of hues are available in canisters of shoe polish, ranging from dark browns to blacks to more neutral tones. You should search for a shoe polish that comes near the original shade of your shoes.
Polishes are also offered in wax and cream; cream polishes nourish the leather, making it more smooth, while wax polishes make the shoes waterproof. If possible, you should purchase a tin of each polish and switch between the two for every other coat of polish you apply.
Additional features include a cleaning brush, a toothbrush or cotton swabs, soles dressing, and leather cleaner and conditioners.
Preparation of the working space
Preparing for your working environment is essential to prevent shoe polish from getting on any furniture or flooring. Shoe polish is notoriously challenging to remove, which is precisely why it should never be applied to any surface other than your footwear.
Spread newspaper or old paper sacks on the surface or work area and take a cushion or a comfy chair — shoe polishing can take a while.
If you intend to do a very effective job on your shoes, you should consider removing the laces before polishing. This allows for easy access to the tongue.
Cleaning shoes to get rid of dirt
To get rid of any dust, salt, or other debris from the surface of each shoe before you start polishing, use a horsehair brush or a damp cloth. This is crucial because any material left on the shoes’ surface could scratch them as you clean.
Application of the shoe polish
Apply a thin layer of polish to the upper surface of the shoe using an old t-shirt or a polishing brush. Ensure the polish is spread out evenly. Polish should be worked into the shoe in a circular motion to reach every part of the shoe. Concentrate your efforts on the toe and heel since these regions typically see the most wear and tear and may require an additional layer of polish.
After you have done shining the first shoe, place it on the newspaper and start shining the second shoe similarly. Before moving on to the following stage, give each shoe approximately 15 minutes to dry out completely.
Using a shoe-shining brush, eliminate extra polish
After the polish has enough time to dry, you can remove the excess using your horsehair shoeshine brush. Brush the whole shoe thoroughly, using even and short strokes. It is important to keep in mind that the movement should originate from your wrist rather than your elbow.
Make sure you apply the polish with a brush specific to the hue of the polish you are using. Otherwise, you are at risk of mixing the current color with the one that was on the shoe before, especially in cases where the present polish is lighter than the one that was used previously.
Polish the shoes with a rag
The final phase in cleaning and shining shoes is to buff them with an old (clean) T-shirt or microfibre cloth until they attain a high sheen. Use a rapid side-to-side motion when buffing; this may be easier with a shine butler or when the shoe is on foot.

Spit Shine
Prepare the footwear and apply the initial coat of polish
First, remove dirt and debris from the shoes using a moist cloth or horsehair brush. Then, using a fabric or polishing brush apply a polish to your shoe.
Soak a cotton ball or towel in water
Spit shining involves applying polish in multiple layers using a cotton ball or moist towel in between each application. If you are going to use a cloth, you need to make sure that you wrap it around your hand very tightly, making sure that the material covers your index and middle fingers. If you have your fingers coated in cloth, or a cotton ball, dip them into a dish of water until they are damp but not dripping.
Polish the shoes
Take a shoe in your hands and use the cotton ball or moist towel to start buffing the dry polish on the initial layer of the shoe. When working the polish into the shoe, it is important to take your time and use small circular motions. The key to spitting success is skill, not speed.
Re-wet the polishing cloth and add a second layer of polish
After buffing the shoes and ensuring they are dry, re-soak the cotton ball or towel in the water and wring it out until it is only slightly moist. Utilize this material that has been dampened to apply a second thin layer of polish to the surface of the shoes, being sure to follow the same methodical process as previously.
Apply additional layers of polish to achieve the intended shine
You must apply numerous thin layers rather than just one or two thick coatings since this enables each subsequent layer to build on the preceding one, resulting in a surface that is as reflective as a mirror.
Before putting on the shoes for the first time, you can give them one more polishing with an old t-shirt or a chamois if you prefer, but this step might not be necessary.
Fire shine
Cleaning the shoes
To get your shoes ready for the fire shine, clean them first by removing any dirt or debris with a moist cloth or a horsehair brush. During the polishing process, the upper surface of the shoes won’t get scratched, thanks to this precaution. When performing a fire shine, some people will additionally employ a process known as “stripping,” which includes removing any prior coatings of polish from the shoes.
Light the shoe shine using a lighter
Turn the can of shoe polish upside down over a cigarette lighter once you have opened it. This method should work with the majority of ordinary types of shoe polish. To start a fire on the surface of the polish, turn on the lighter and wait for it to burn. Immediately turn it over so that the melting polish will not leak onto the ground below.
After allowing the polish to blaze for a couple of seconds, carefully replace the cap on the bottle and blow out the flame to end the burning process.
When you uncover the tin, you should see that the polish has melted and become mushy on the surface.
Utilize a wet cloth to apply the molten polish to the shoes
Enclose an old T-shirt over your hands and dunk them in a cup of warm water until they are damp but not leaking. This damp cloth should be dipped into the melted polish and then applied to the shoes in short, circular movements. Utilize a wet cloth to apply the molten polish to the shoes.
Take your time and make an effort to fully work the polish into the shoes so that it forms a layer that is smooth and even. It is essential that you do not forget to rub the polish into any cracks or crevices that are hard to reach.
If you need extra polish or the cloth gets too dry, you can re-polish it by dipping it in water and then using it again.
Continue applying polish in thin layers until the shoes begin to gleam
To get the required shine on the shoes, you may need to apply many coats of polish in multiple layers. This will depend on the shoes. Always employ the same method: dipping the wet cloth into the melted polish and spreading it over the shoes in an even layer.
Warm the shoe’s outside using a lighter or hair dryer.
This step is optional but will significantly enhance the shine of your shoes. Pass the flame of your lighter over the whole surface of the shoe.
The flames should never directly come in contact with the shoe but should be near enough to melt the polish.
Apply a last coat of polish
You can apply one additional layer of polish by following the same procedure as in the previous step. At this point, your shoes should have a glossy sheen comparable to that of glass. If you want to give the shoes one more buff, you can use a chamois or any other clean cloth that does not have lint.
What is the Difference Between Shoe Wax and Cream Polish?
Wax
In contrast to cream shoe polish, wax can produce a greater gloss finish. This is because it is composed of vast quantities of hard waxes that may be polished to create a beautiful sheen.
When should I apply wax to my shoes? If you wish to cover scuff marks, safeguard your leather, or bring out a great sheen on your shoes, you should choose wax. The hard waxes can give a protective layer to your shoes, allowing them to retain their pristine appearance.
Cream polish
Cream polishes replenish and moisturize your shoes more effectively than wax polishes. Leather is a natural material susceptible to deterioration and fading over time. This is precisely where cream shoe polish gets to be useful; it restores the color brightness of your shoes, making them appear brand new! Remember that the cream polish produces a satin finish instead of a high-gloss sheen-like wax.

What Are Different Types of Shoe Brushes?
Horsehair brush
Horsehair brushes are brushes composed of horse hair. The brush’s user-friendly broad handle and long bristles deliver excellent coverage and effective shine.
Goat hair brush
This is a brush made from goat hair, which is softer and more flexible. The brush is appropriate for all ability levels.
Nylon cloth brush
A nylon brush is composed of nylon polymer threads that are durable, resilient, flexible, and elastic.
Suede brush
The suede brush helps clean suede shoes softly. This brush is essential for removing dirt and mud from suede and nubuck. The bristles are gentle on your shoes but tough enough to loosen mud or debris that has become entrenched.

What Are the Best Brands for Shoe Polish?
How to shine shoes FAQs
How does one make their polish?
Homemade polish is prepared from local ingredients. They are utilized at home. In the household, wooden furniture is polished with homemade furniture polish.
How is petroleum jelly used to polish shoes?
Using Vaseline to polish your shoes is simple. You only need to take a small amount and spread it over the shoe. Next, use a paper towel to wipe the shoe well.
What are the essentials in shining shoes?
To make your shoes shine well, you need; shoe polish, a polishing cloth, a cleaning rug, and a shoe brush.
What is the expected duration to shine your shoes?
Depending on the desired outcome, the time required to shine shoes might range from five minutes to two to three hours.
Do shoes require a brush to be polished?
Whether you go for a stiff-bristled brush or an old T-shirt, we strongly advise getting a long-bristled, softer brush to remove any extra shoe polish.
Learn more shoe tips with Sizzey!


